This is a brief guide for those of you who have just started working with our platform. We’ve put together ten steps that will help you get onboard.
Step 1. Set up a project.
To start working with the platform, you have to set up a project. Specify a domain name, choose a tracking mode, and add at least one search engine. Otherwise, our system won’t be able to provide you with any SEO data at all. At this stage, you can also upload keywords from the .csv or .txt file.
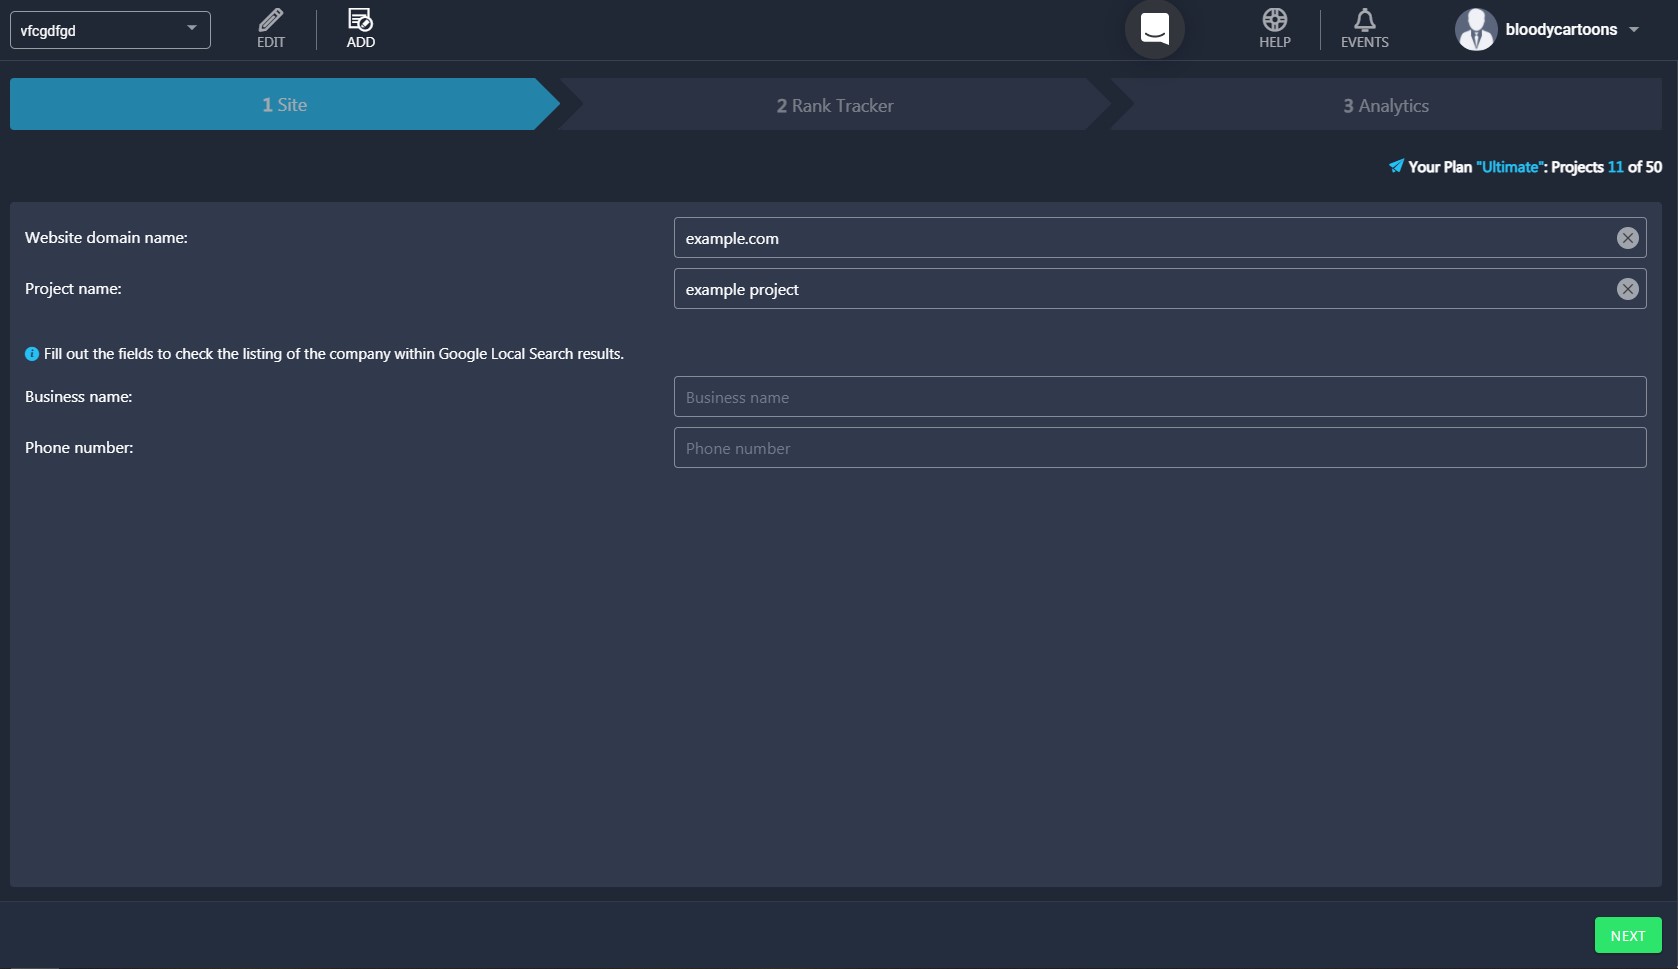
Click here to learn more about the process of project setup.
Step 2. Connect Google Analytics
Nobody would argue that Google Analytics data is extremely important for building a successful SEO strategy. To analyze your Analytics data, you should integrate your GA account into RankActive. That will enable you to use our Analytics tool. It can help you understand whether your actions lead to desired results. All information received directly from your Google Analytics account is smartly segmented and displayed in the most convenient way.
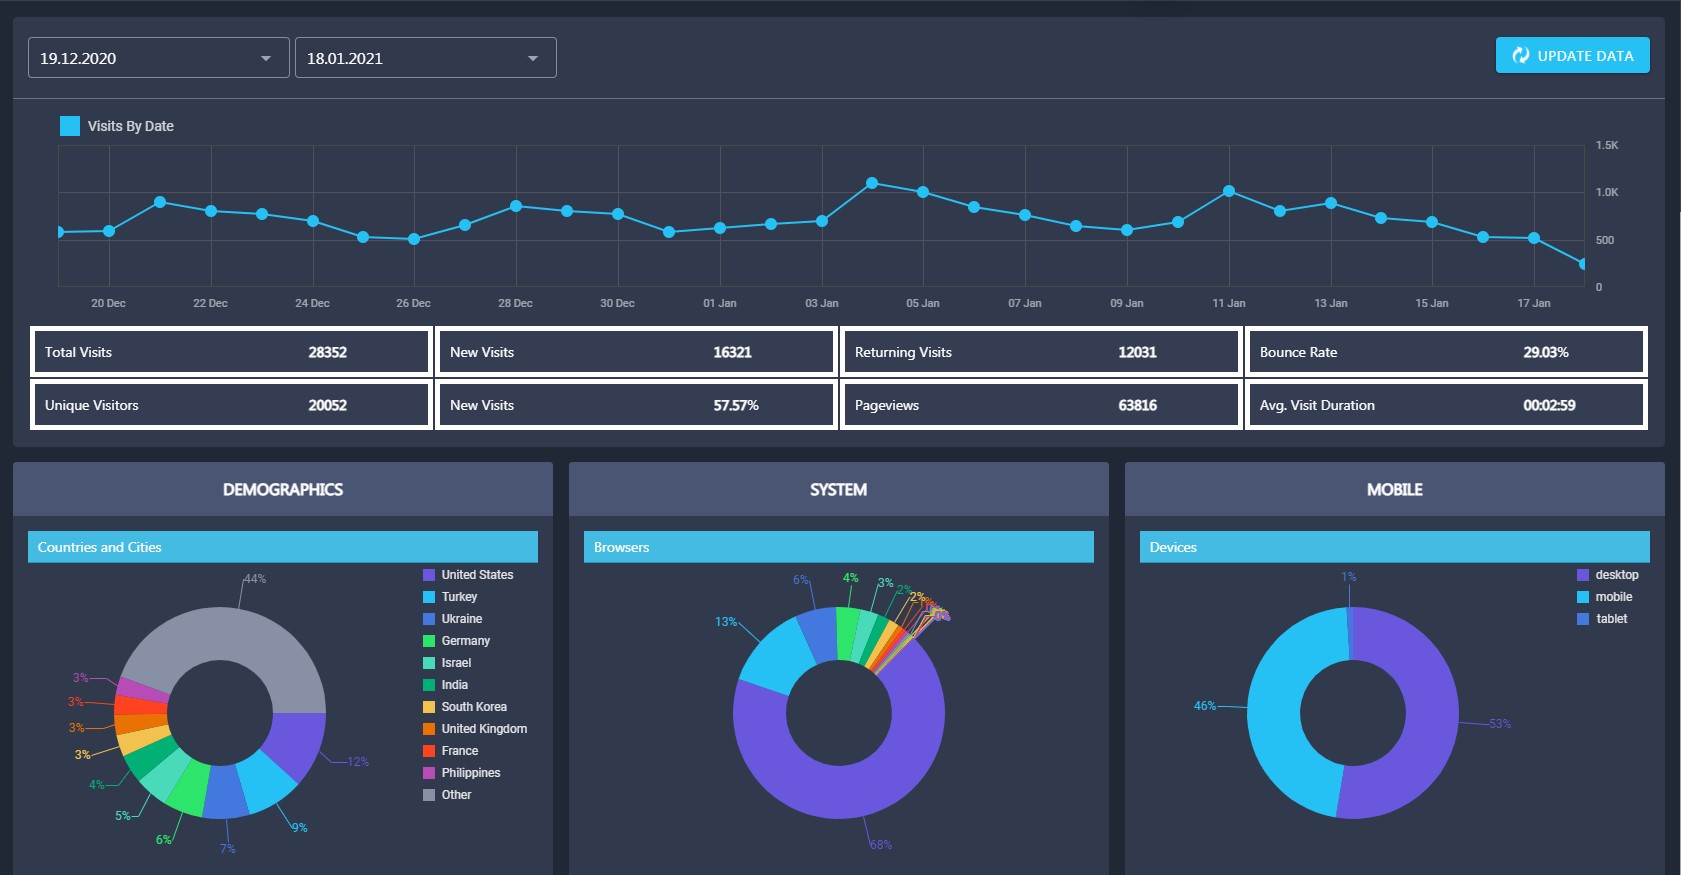
Click here to learn more about the Analytics tool.
Step 3. Run Keyword Research
Then, as you’ve figured out what’s going on with a website in general, it’s time for keyword research. You can use our Keyword Finder to search for related, similar, and suggested keyword ideas. What’s more important, in the Ranked Keywords you can search for keywords that your website is already ranking for and add them to Rank Tracker. Also, you may find it convenient to run PPC keyword research with the RankActive Adwords Keyword Planner.
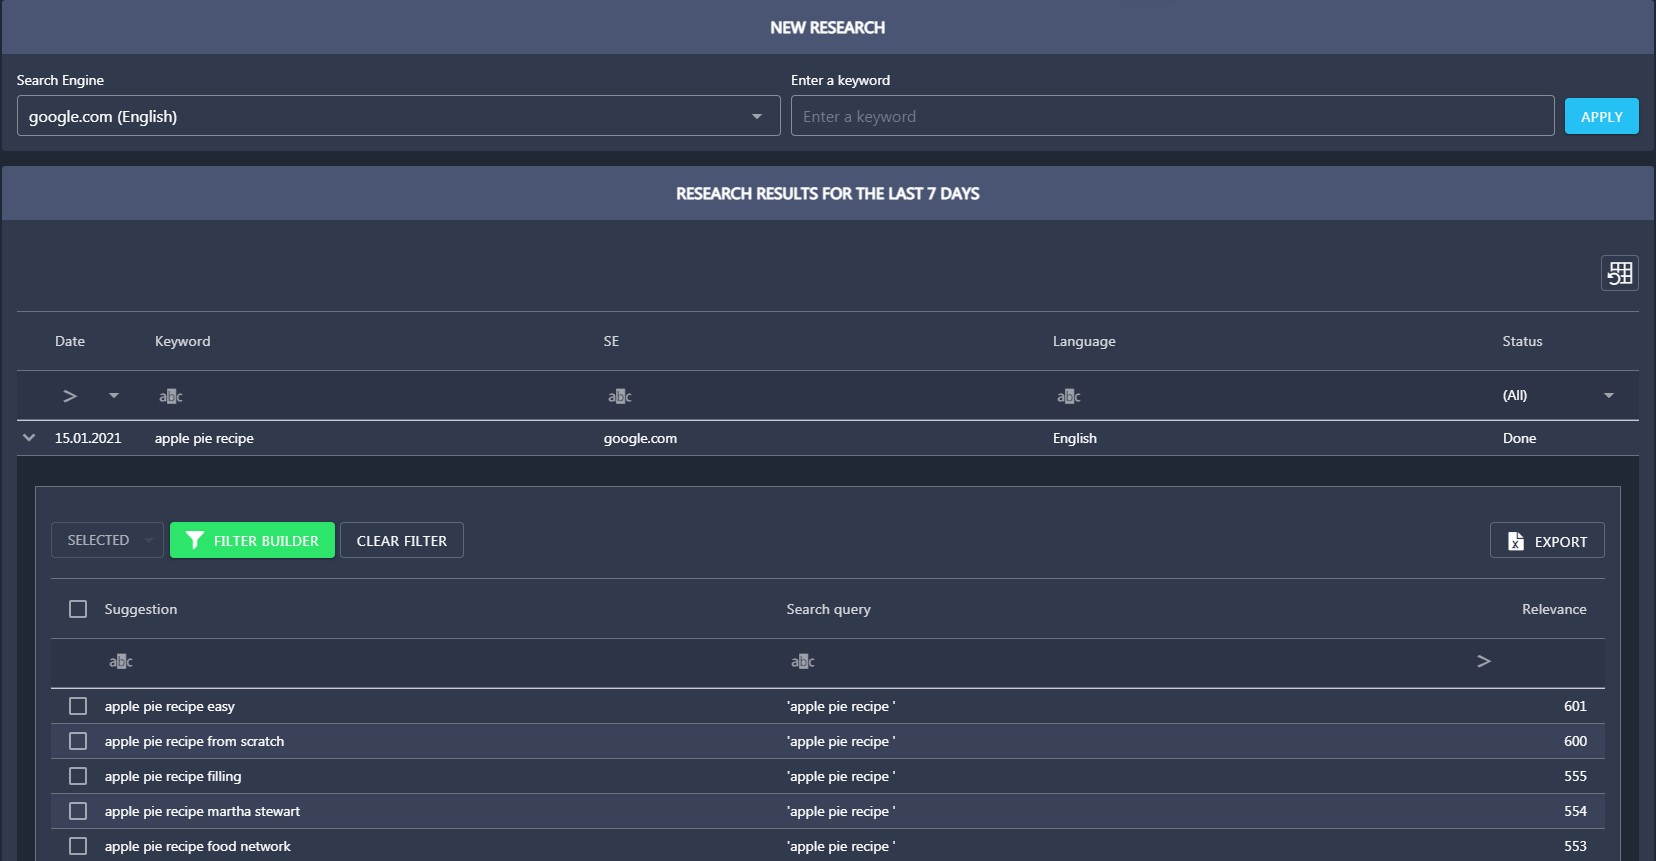
Click here to learn more about Keyword Finder.
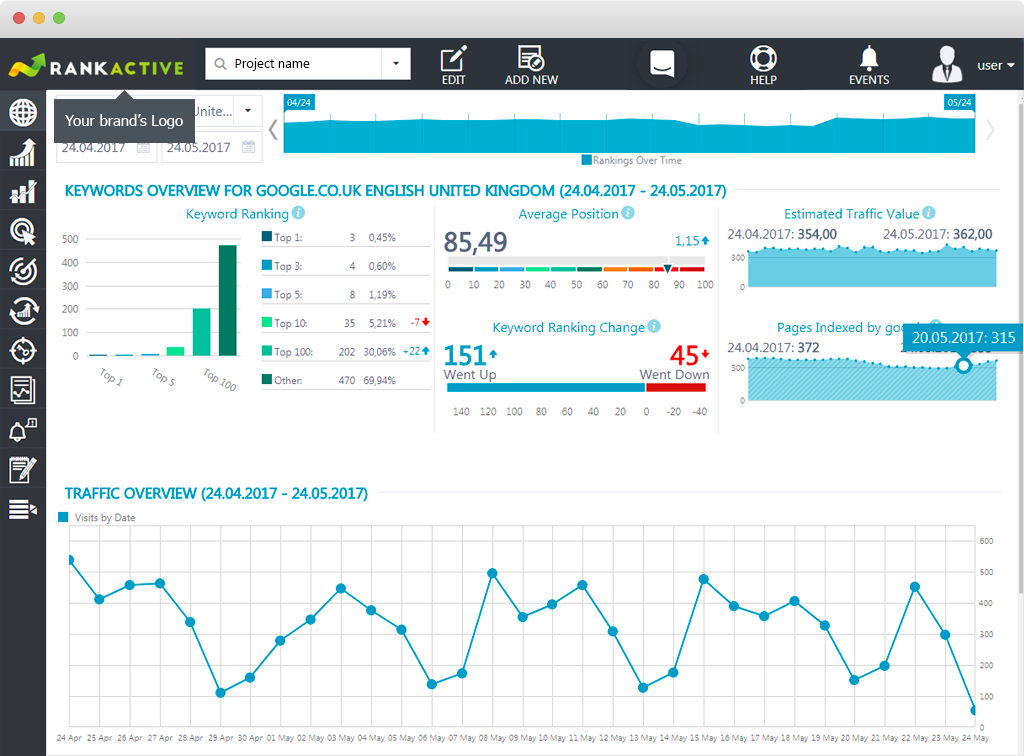
Step 4. Check the Dashboard
You’ll get the first data in just a few minutes after setting up a project. Check out the Dashboard section to observe key information about your website and estimate the current situation with its online performance. For example, how many keywords you’ve added to a project are in TOP 1, the average position of all keywords, the number of visitors, and so on.
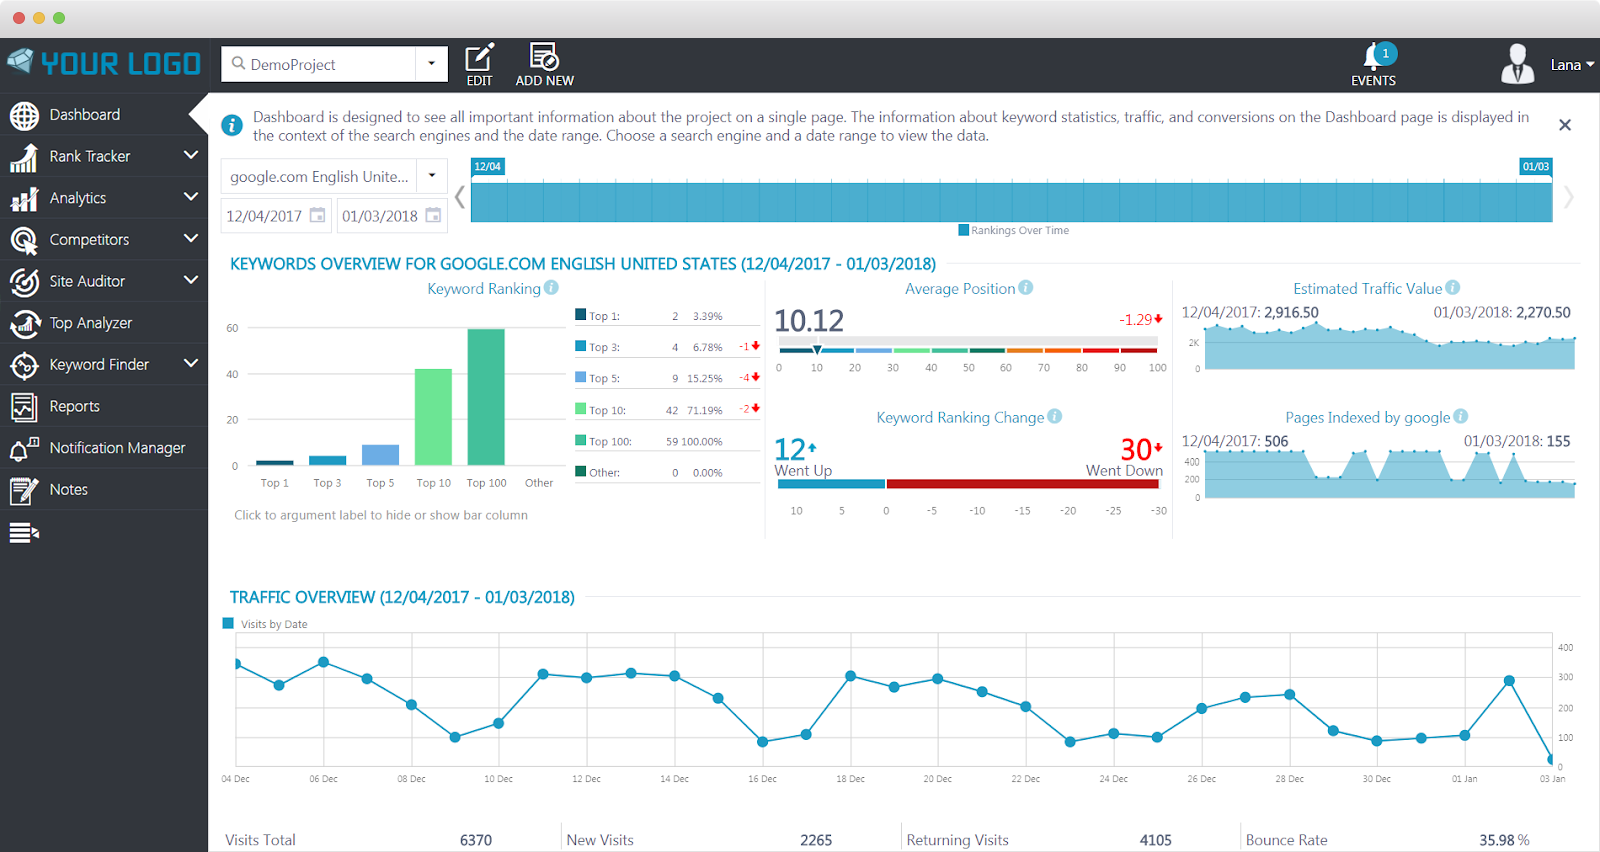
Click here to learn more about the Dashboard.
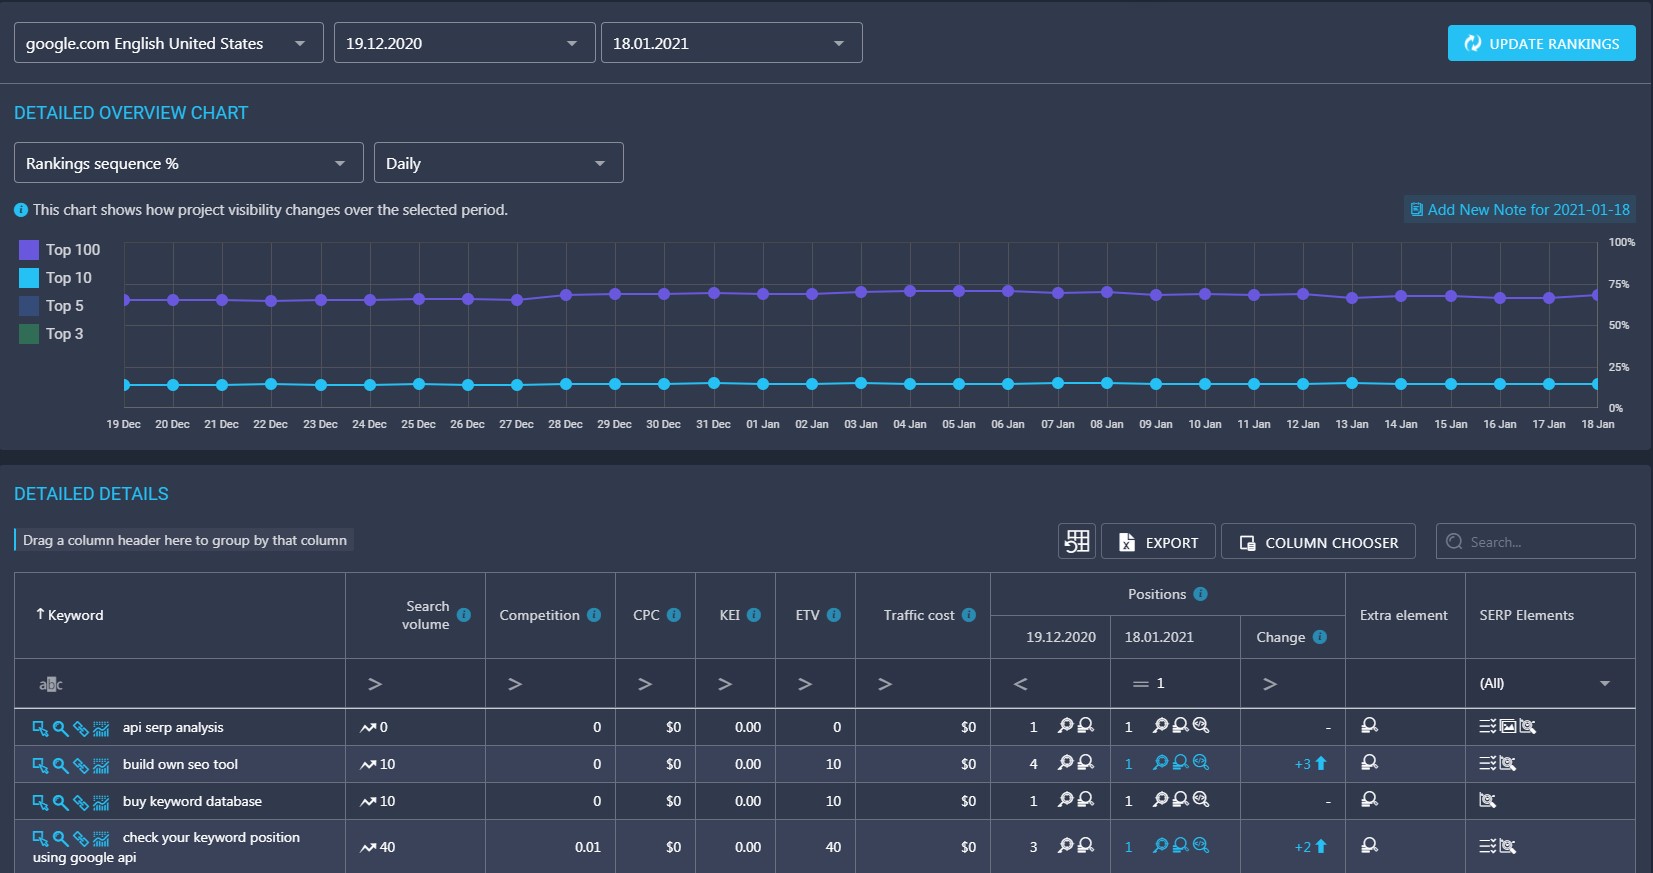
Step 5. Rank Tracking setup
After you’ve conducted keyword research, you can add your keywords to the Rank Tracker to find out how they stand in SERP. Rank Tracker has numerous sections, each of which contains an important part of information related to a website ranking data. For example, you can use the Detailed View section to see the results of conducted keyword research based on their efficiency parameters. You’ll find out what keywords are likely to be successful and which ones should be excluded from your keyword list.
Click here to learn more about RankTracker.
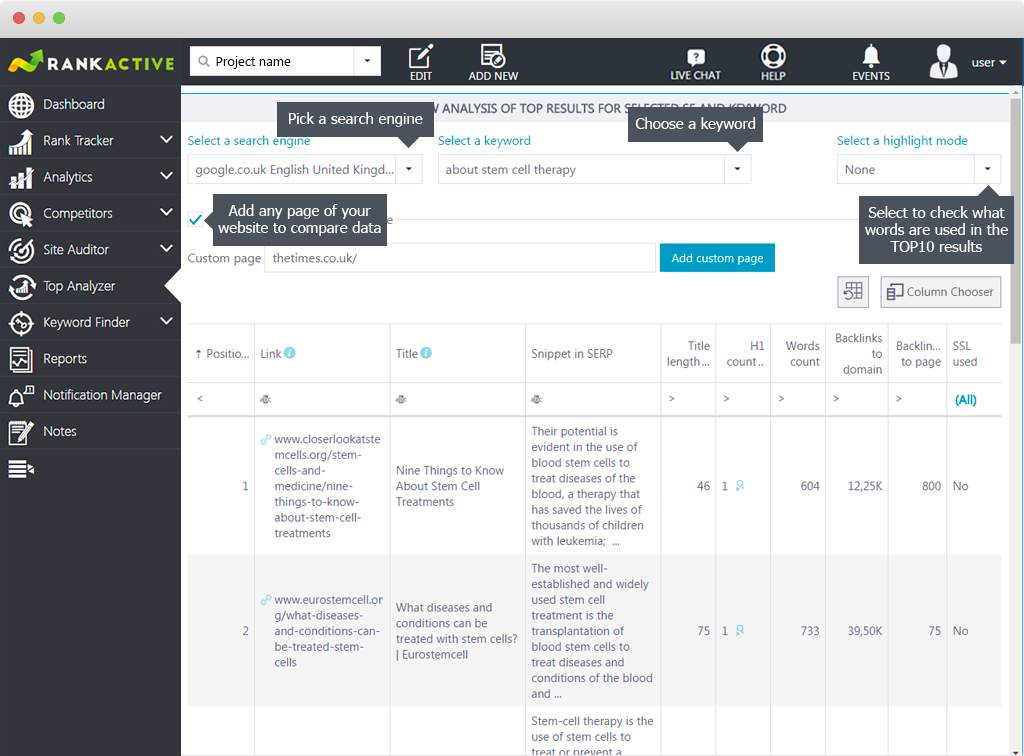
Step 6. SERP analysis
If you want to spend less time analyzing SERP data and collecting information about websites in TOP 10 of any search engine, then Top Analyzer is what you need. It provides data that any SEO needs to conduct efficient analysis and use its results for building a successful optimization strategy.
Click here to learn more about TOP Analyzer.
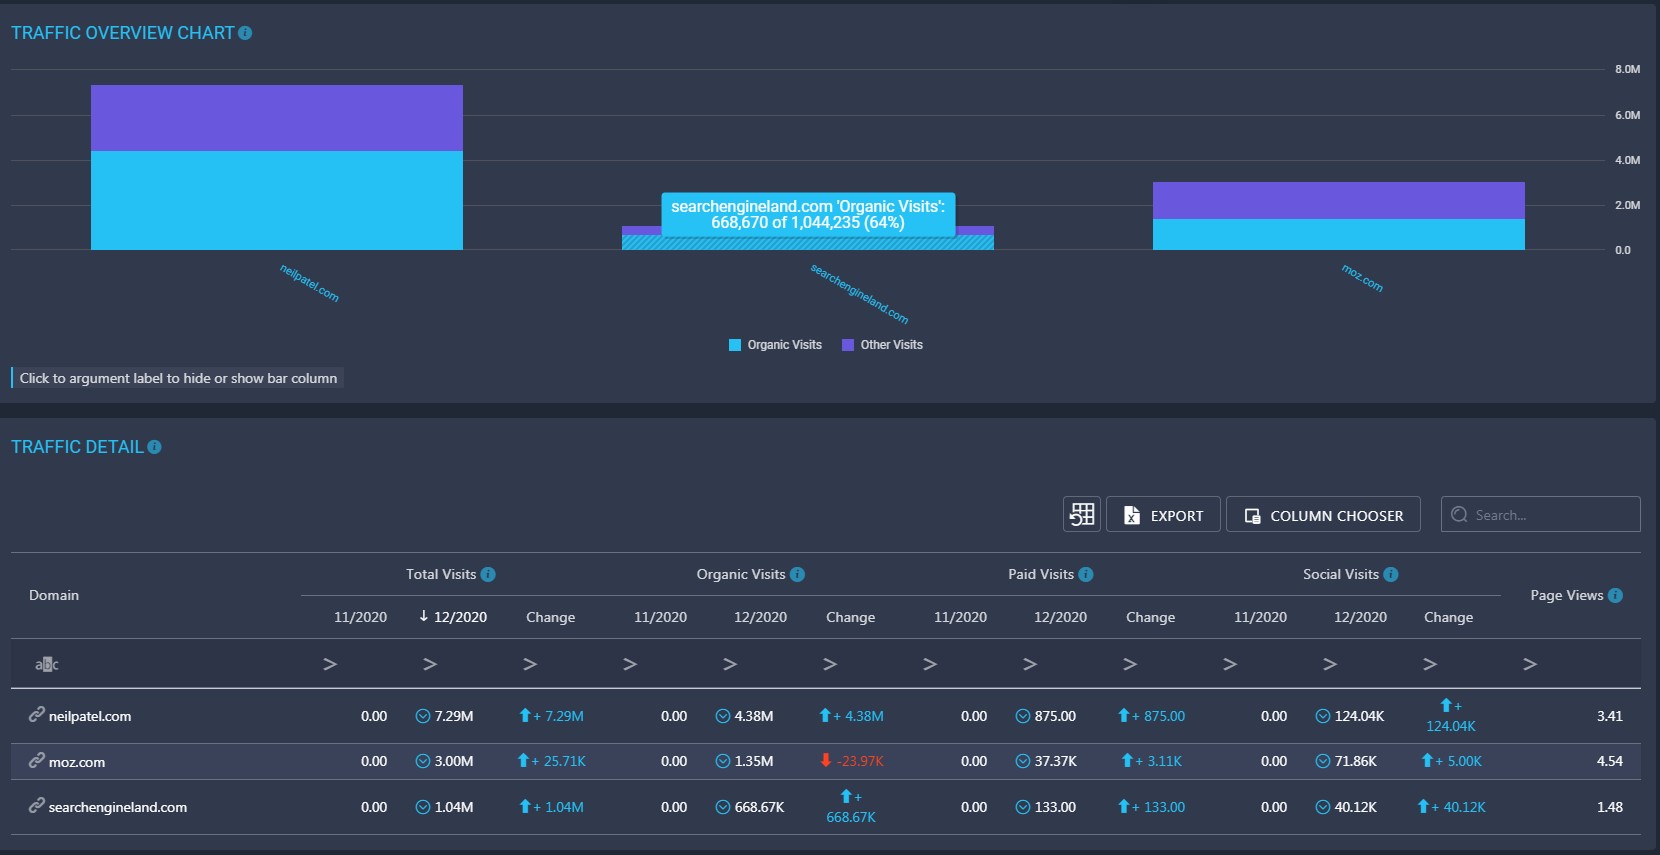
Step 7. Competitor analysis
Now let’s take a look at the direct competitors of your website. You can do it with the Competitors Inspector tool. It is divided into four sections: Traffic, Competitor Rankings, Visibility, and Keywords. Each of these sections will provide you with comprehensive information about your competitors.
Click here to learn more about Competitors Inspector.
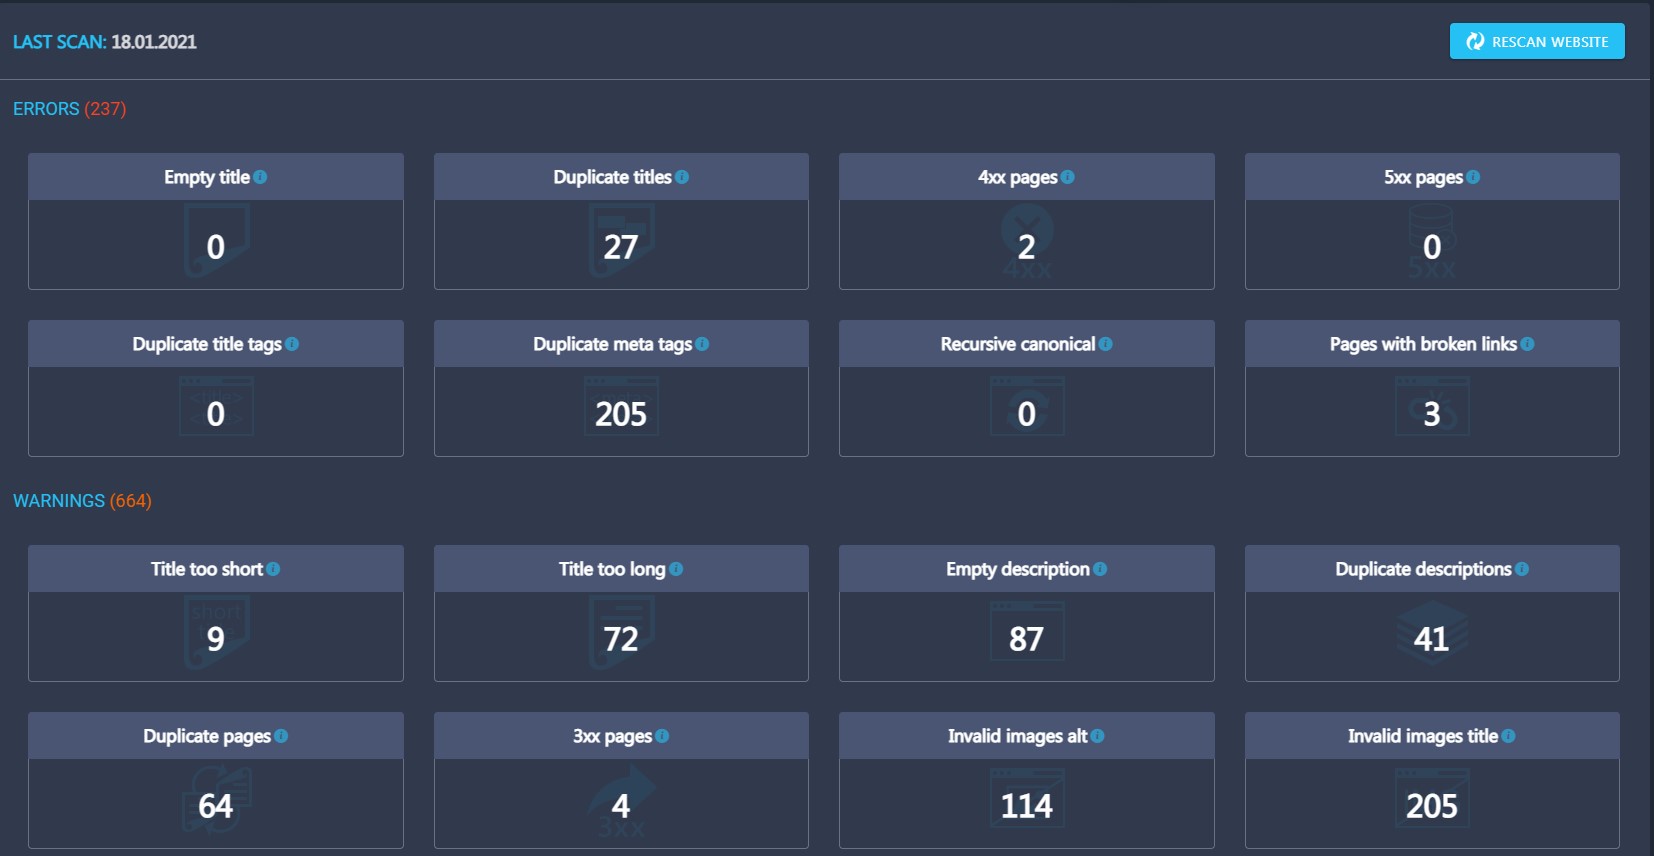
Step 8. Run website check-up with Site Auditor
It is crucial to regularly check up a website for on-page errors. That’s exactly what our Site Auditor can help you with. You’ll get daily results subdivided into multiple sections. Basically, with the Site Auditor, you won’t miss a single on-page issue.
Click here to learn more about Site Auditor.
Step 9. White Label setup
The White Label feature is the best decision for SEO companies and freelancers. This feature allows you to provide all the important information to your customers under your own brand: bind your own domain/subdomain, add your own logo, and send branded reports from your own email.
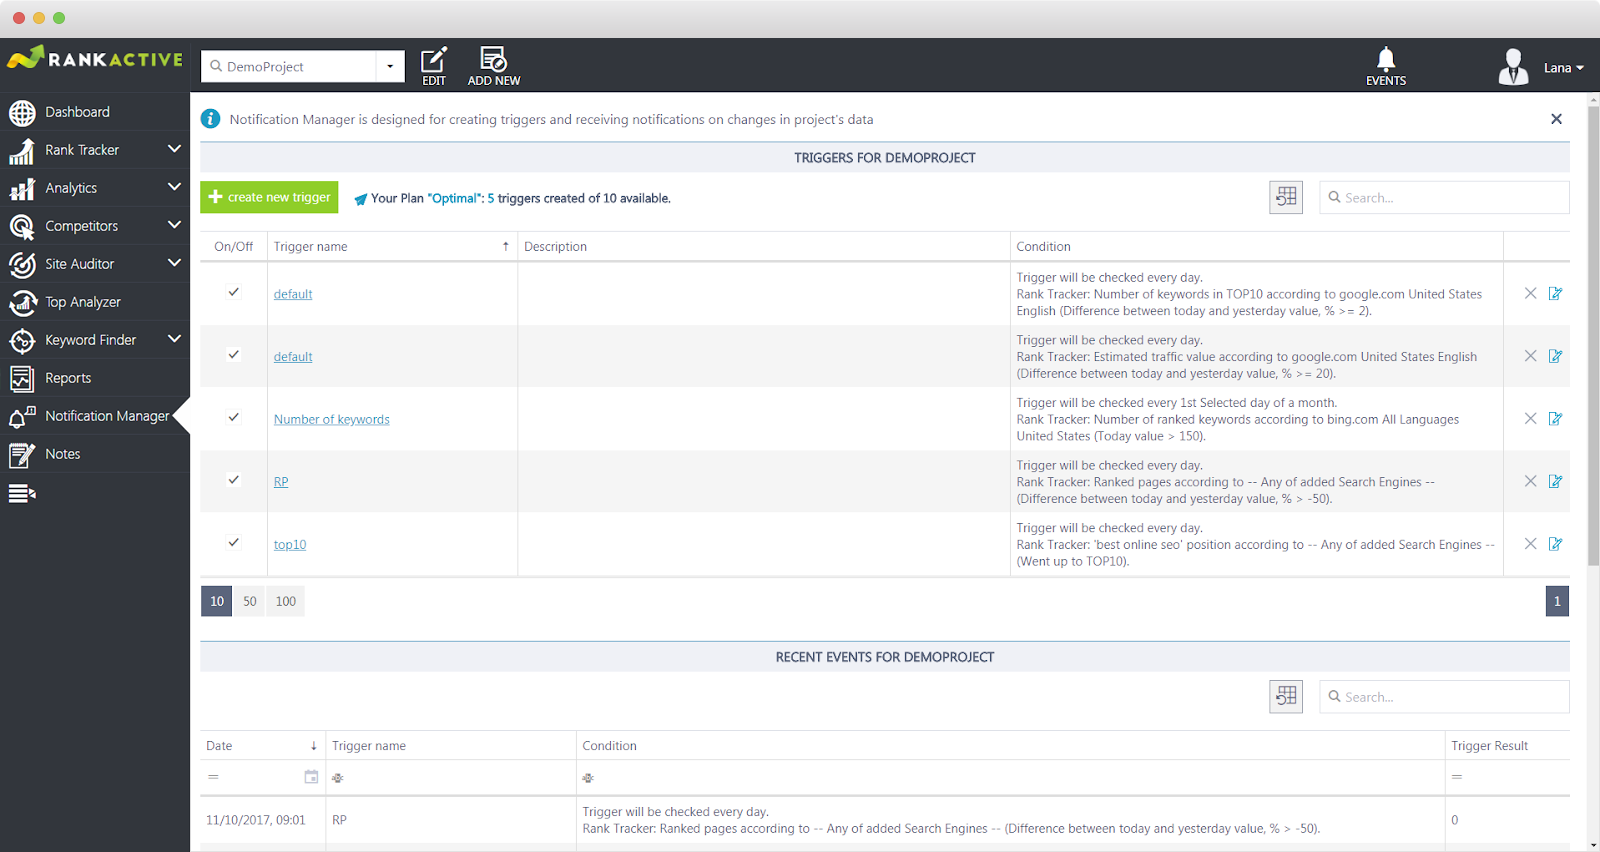
Step 10. Schedule notifications
After you’ve set up the reports, it’s time to think about the notifications on a project data changes. You can use our Notification Manager to get updates about any events in your project’s online history. Just choose a product (to date, only RankTracker is available), search engine, the parameter (visibility, keyword changes, etc.), and parameter criterion (today value, the maximum value for a period, etc.). Created triggers will be checked every day, keeping you abreast of the latest changes in your project’s progress.
Click hereto learn more about Notification Manager.
We hope these tips helped you figure out how to use our platform. Please, let us know if you’d like to have any other features. We’re always ready to extend the functionality of our platform.