In settings, you can set or modify the parameters of the Rank Tracker tool. The Settings section is divided into four parts: Choose What to Track, Choose Search Engines, SERP’S Type, and Keywords.
Choose What to Track

The first thing you have to do is decide what exactly you would like to track. More specifically, you should pick one of the tracking modes available in Rank Tracker Settings.
Domain with subdomains. The collection of data will be based on the domain and all its subdomains, i.e., *.example.com/*
Domain without subdomains. The collection of data will be based on the domain alone (including all its subpages), i.e., example.com/*
URL starts with, with subdomains. The collection of data will be based on the domain with subdomains alone, where the URL starts with the path you have specified, i.e., *.example.com/en/
URL starts with, without subdomains. The collection of data will be based on the domain alone, where the URL starts with the path you have to specify, i.e., example.com/en/
Exact URL. The collection of data will be based on the exact URL, i.e., example.com/sample.html
URL wildcard, with subdomains. Data will be collected based on the domain and its subdomains, where the URL starts with the path you’ve specified (i.e., example.com*lang=eng*). Use * and/or ? to specify the mask.
Rank Tracker allows using wildcards when you create a content rule based on a URL or a URL group. In order to do that, you should use substrings with special characters * and ?, where asterisk (*) stands for any number of characters and question mark (?) represents one character.
→ :example.com/sample.html is a particular page ;
→ :example.* includes all URLs starting with :example ;
→ *sample* includes all URLs containing the sample string ;
→ *example???.org* includes all URLs containing such strings as examplesss.org, example101.org, etc.
URL wildcard, without subdomains. Data will be collected based on the domain alone, where the URL starts with the path you’ve specified (i.e., example.com/*lang=en*). Use * and/or ? to specify the mask.
When it’s done. Go to the next step.
Choose Search Engines
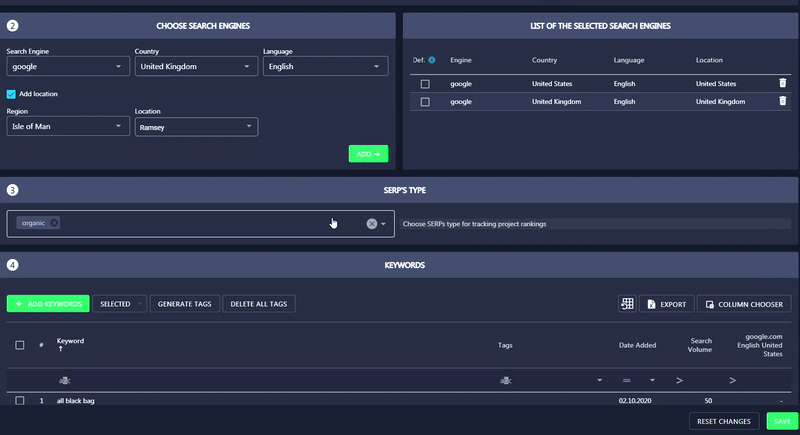
In the second section of the Settings, you need to add a search engine, language, and location. Click on the corresponding fields and choose the parameters from drop-down lists.
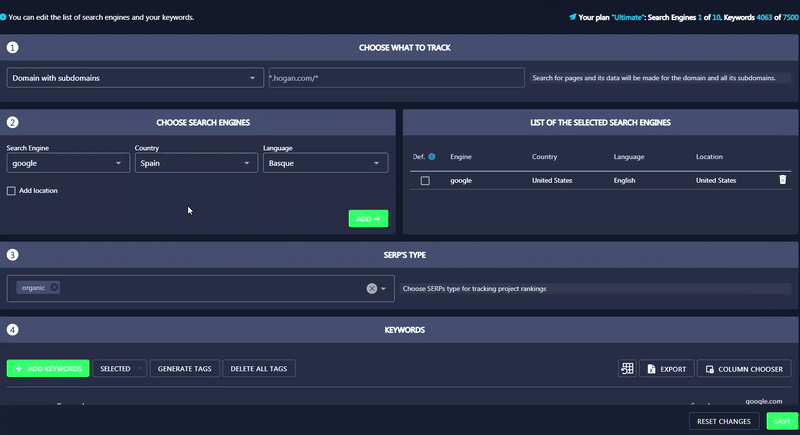
You can narrow the location down by ticking the Add location option and specifying the exact Region and Location in that region.
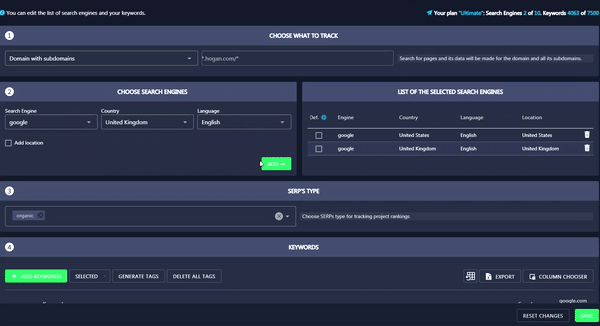
All the selected search engines will be added to the List of Selected Search Engines. We recommend adding several search engines so that you can compare your website’s visibility across different search engines with the Side-by-Side View feature.
SERP’S TYPE
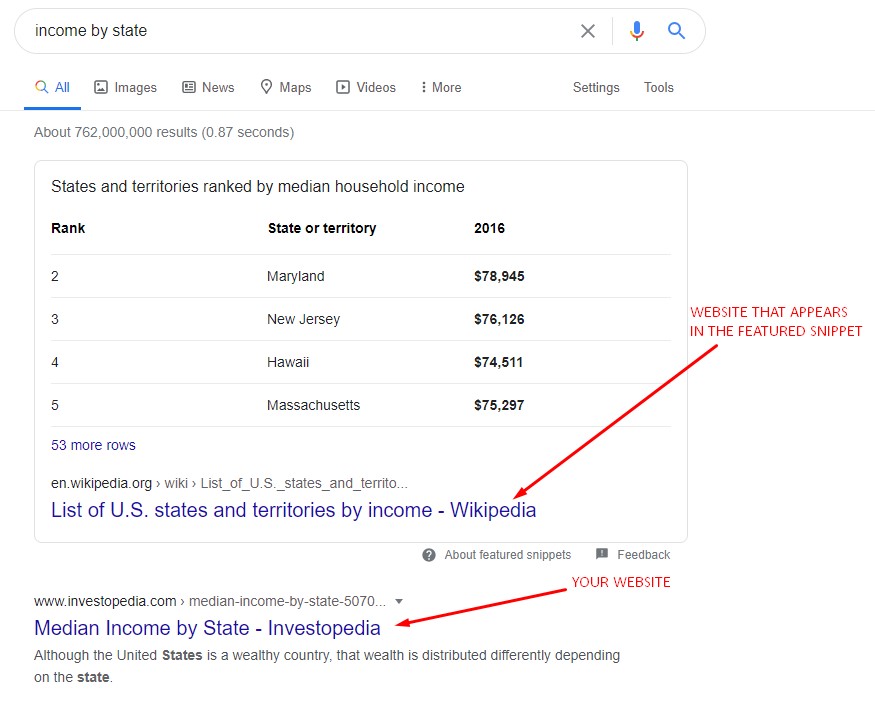
In this section, you can specify SERP’s type that will be tracked by our tool. By default, it tracks only organic results. That means results from carousels, featured snippets, local packs, and other SERP features will be skipped when calculating rankings. If you enable some of the features, our tool will start tracking them and calculating your website’s positions accordingly.
Suppose your website is ranking first for the income by state keyword. If you enable all SERP features that come above organic results, the tool will display your website position according to the SERP types you have selected. For example, if you enable featured snippets with your website ranking below it, your position will be shown as second.
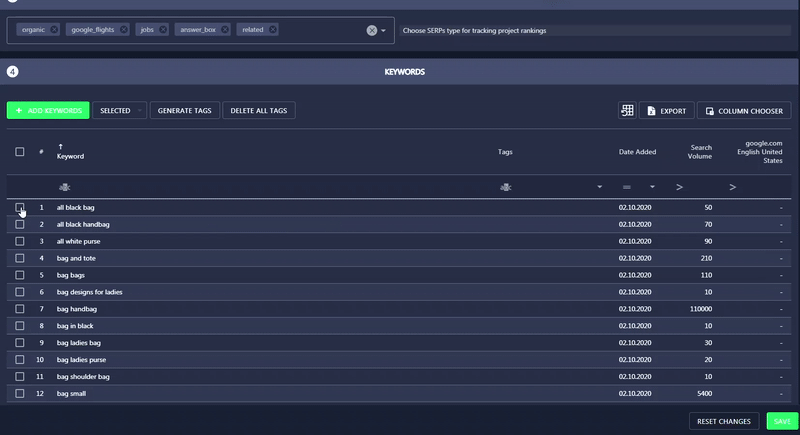
Keywords
In the Keywords section, you have to add your target keywords so that our tool will start tracking them. You can add all terms manually, generate them automatically (they will be extracted from Google Ads), or import them from a csv or txt file. You can also assign tags to the added keywords
After you set up your project, click Save to apply changes.
